- Create a new project
- View and manage existing projects
- Access project-specific API keys and usage statistics
Create a New Project
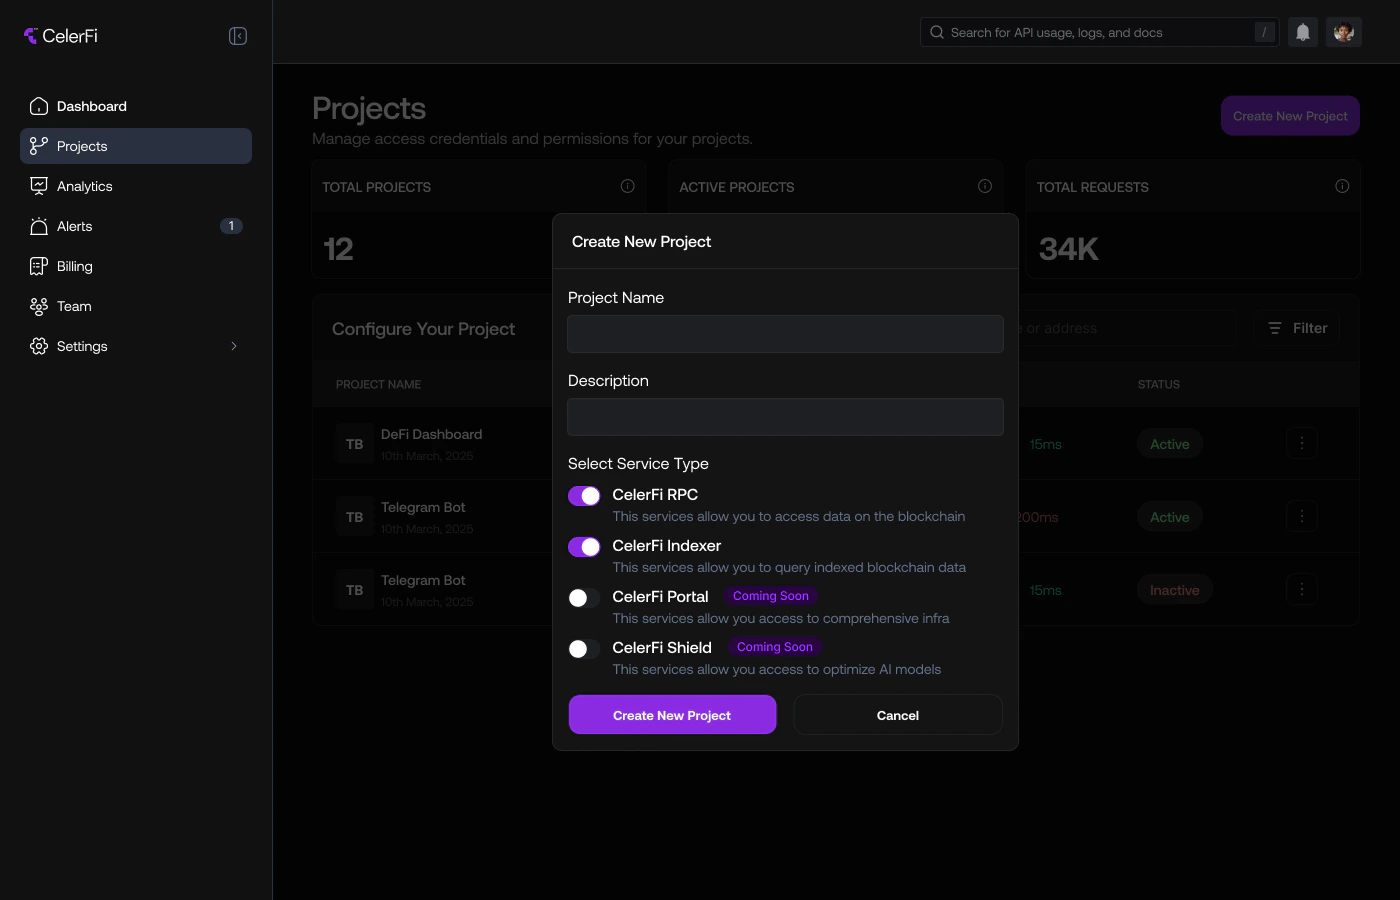
To create a new project do the following:- Navigate to the “Projects” section in the dashboard and click on the “Create New Project” button.
- Provide a name and description for your project to help you identify it later.
- Select or deselect the CelerFi services you want to enable for this project such as the RPC or Indexer.
- Click “Create Project” to finalize the setup.
View and Manage Existing Projects
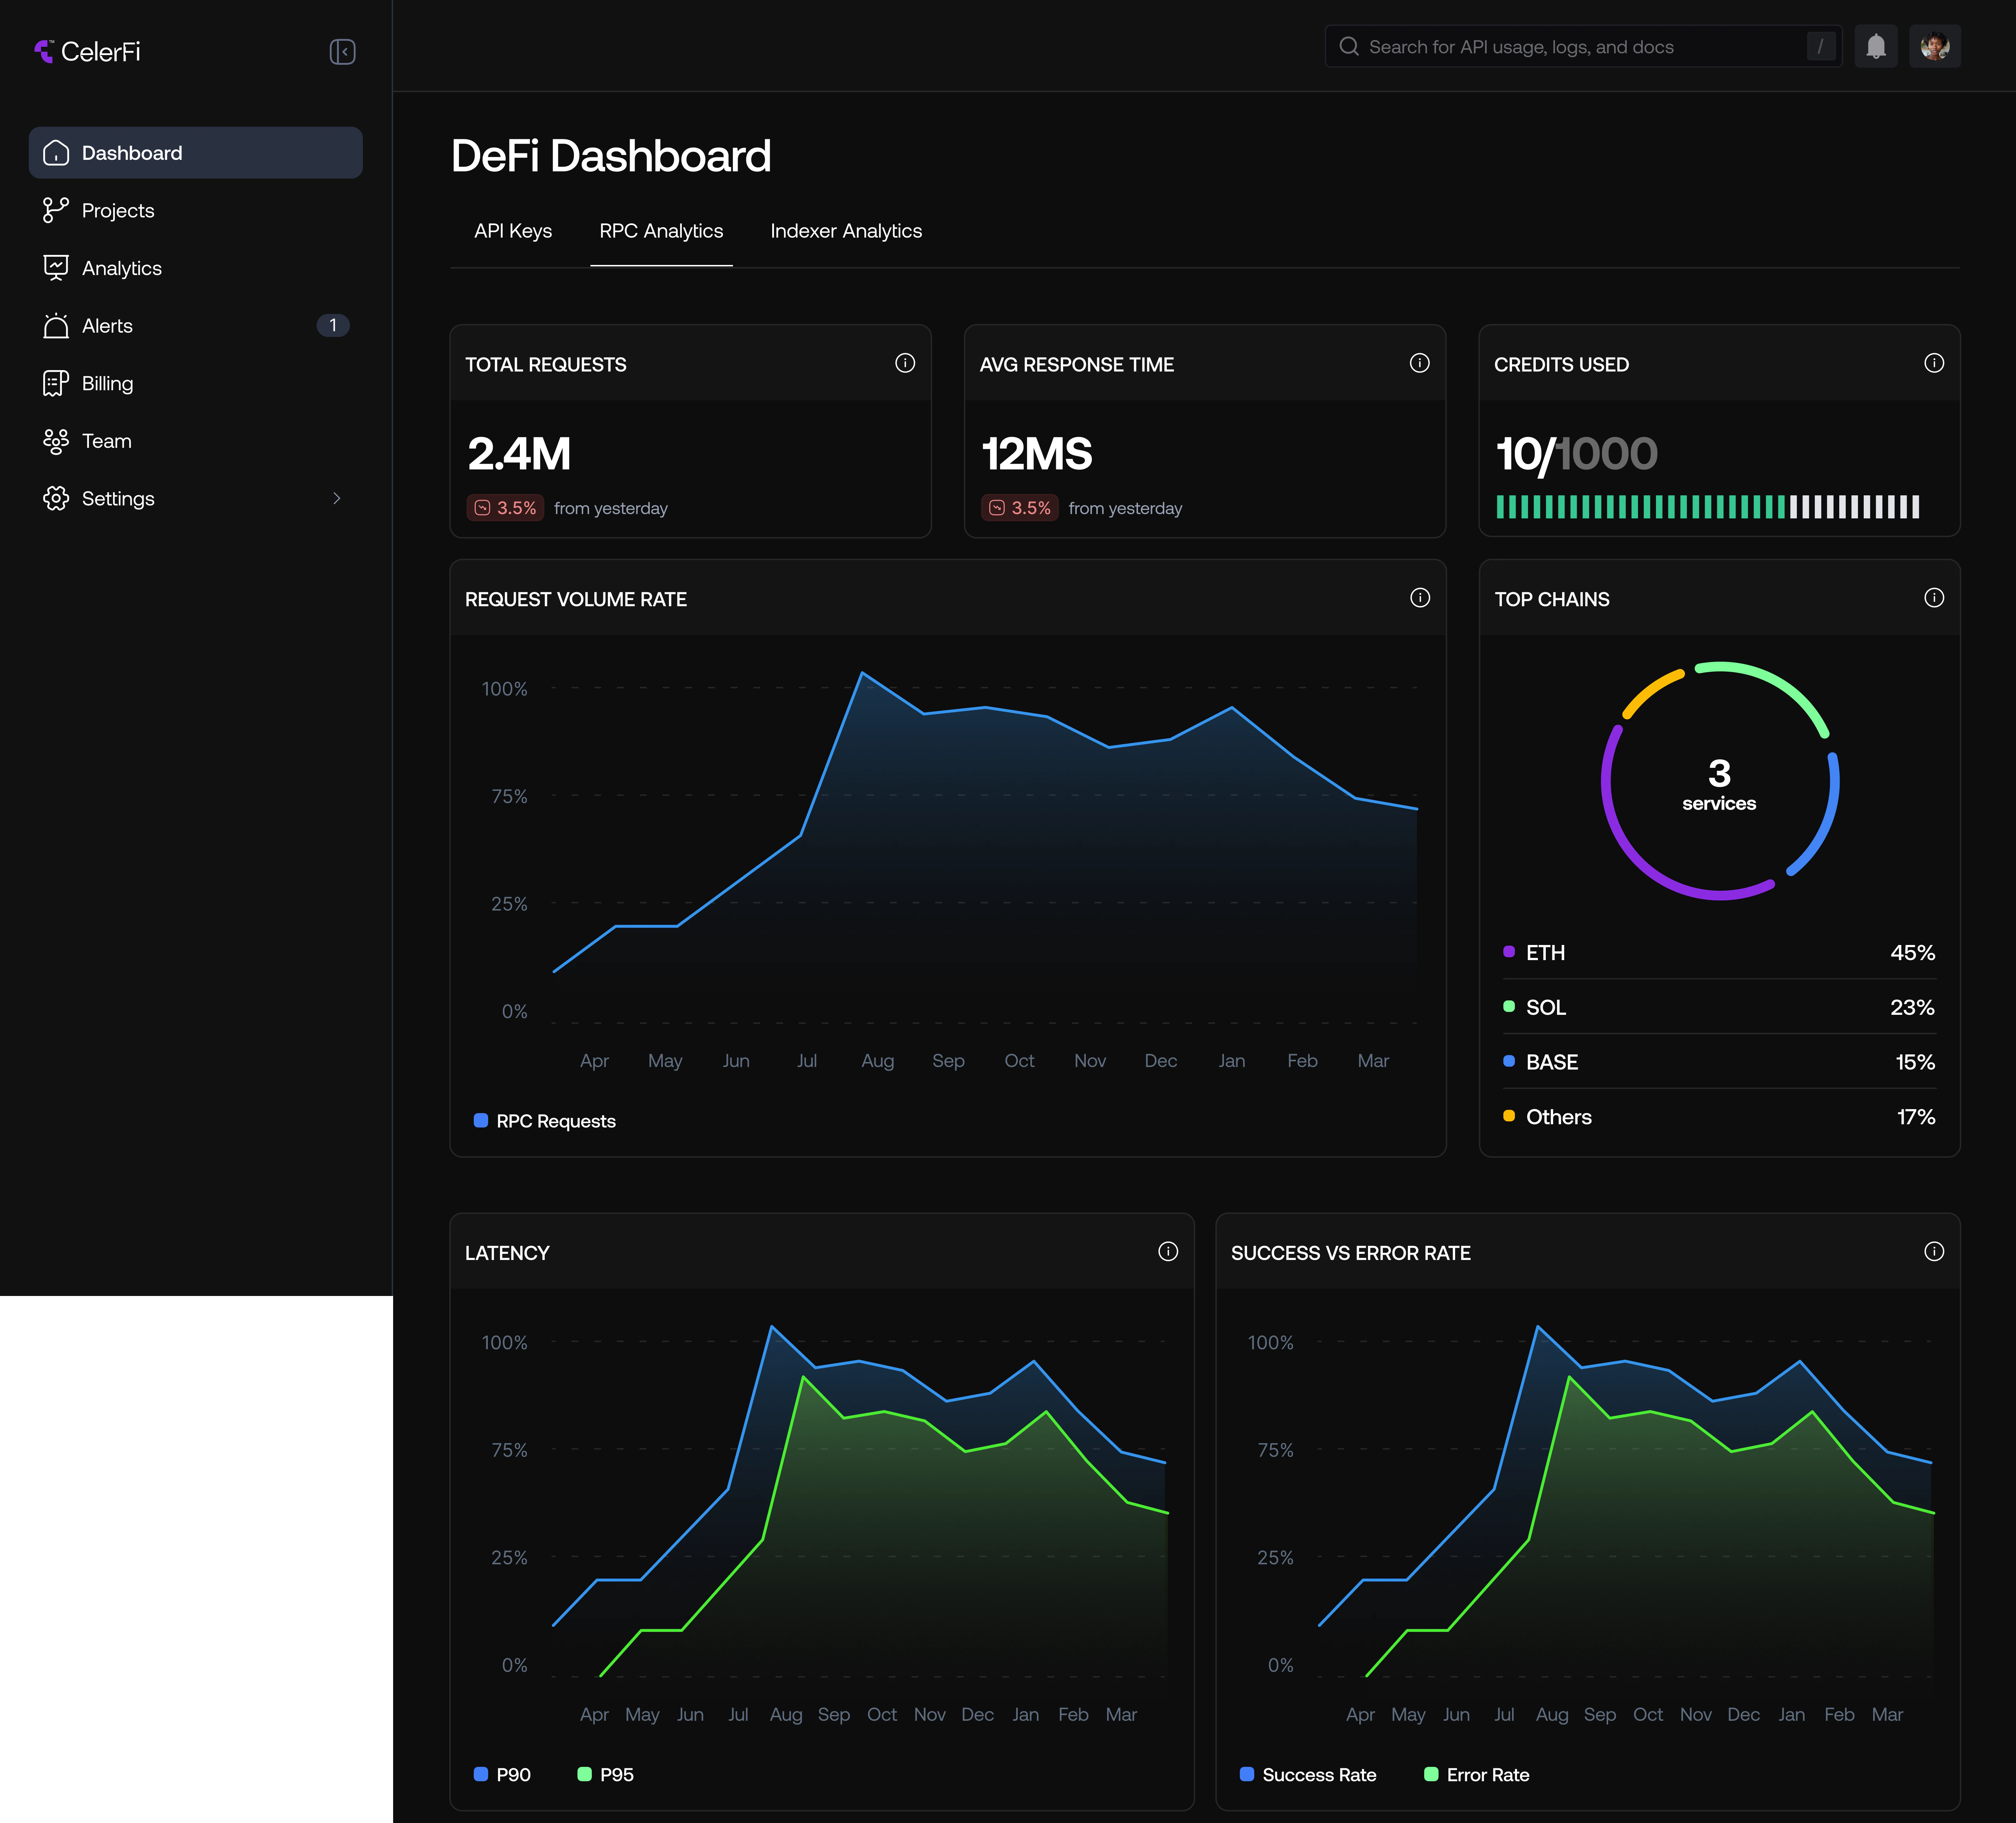
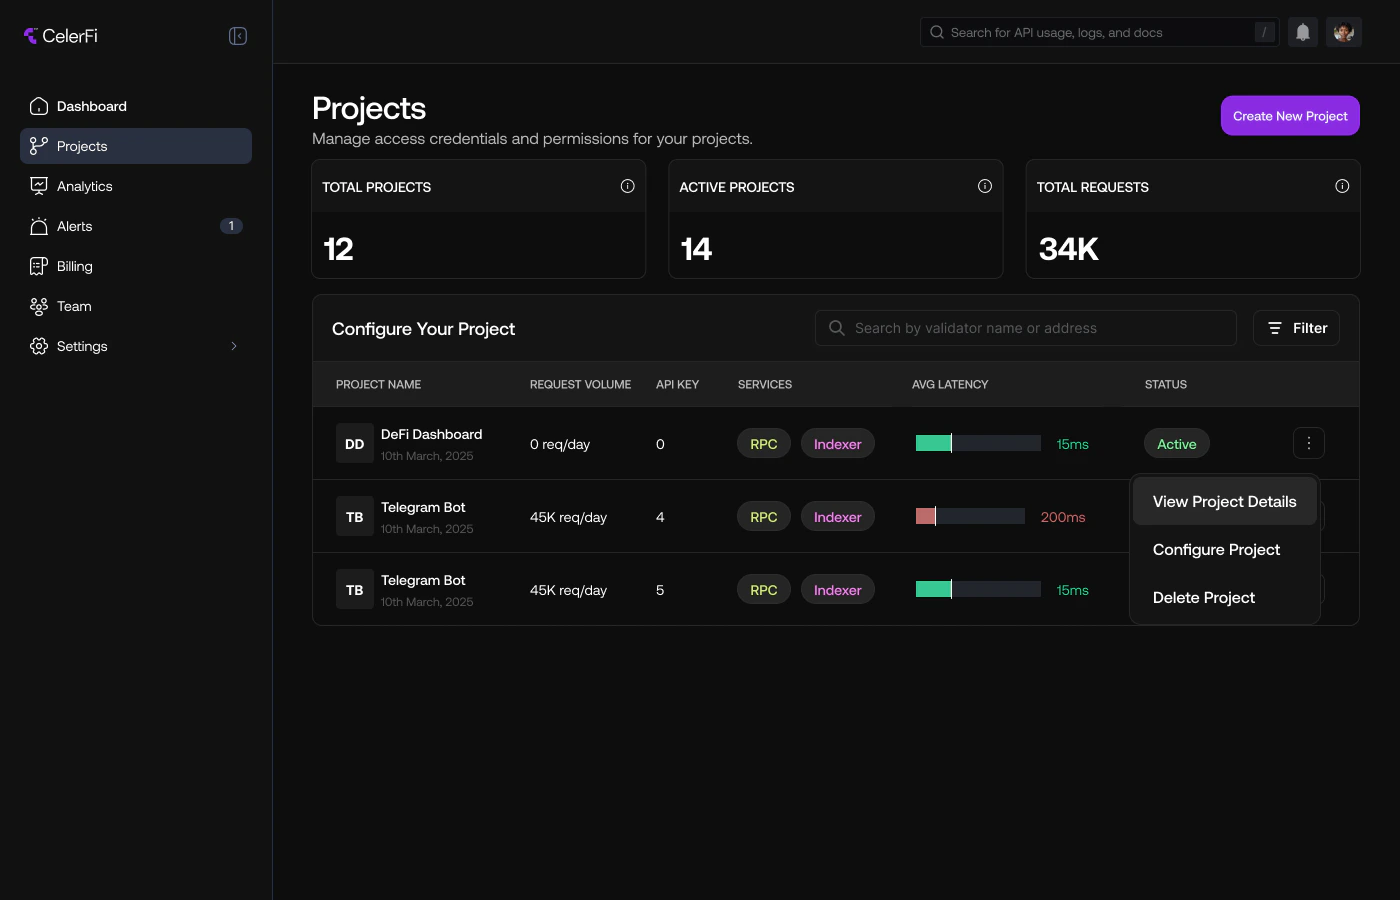
When you create a new project, you can view and manage it in the “Projects” section of the dashboard. You can view your project’s details such as:- Project name
- The reuest volume of your project
- The number of API keys your project has
- The services enabled for your project
- Your project’s average latency
- Your project’s current status.
Access API Keys and Usage Statistics
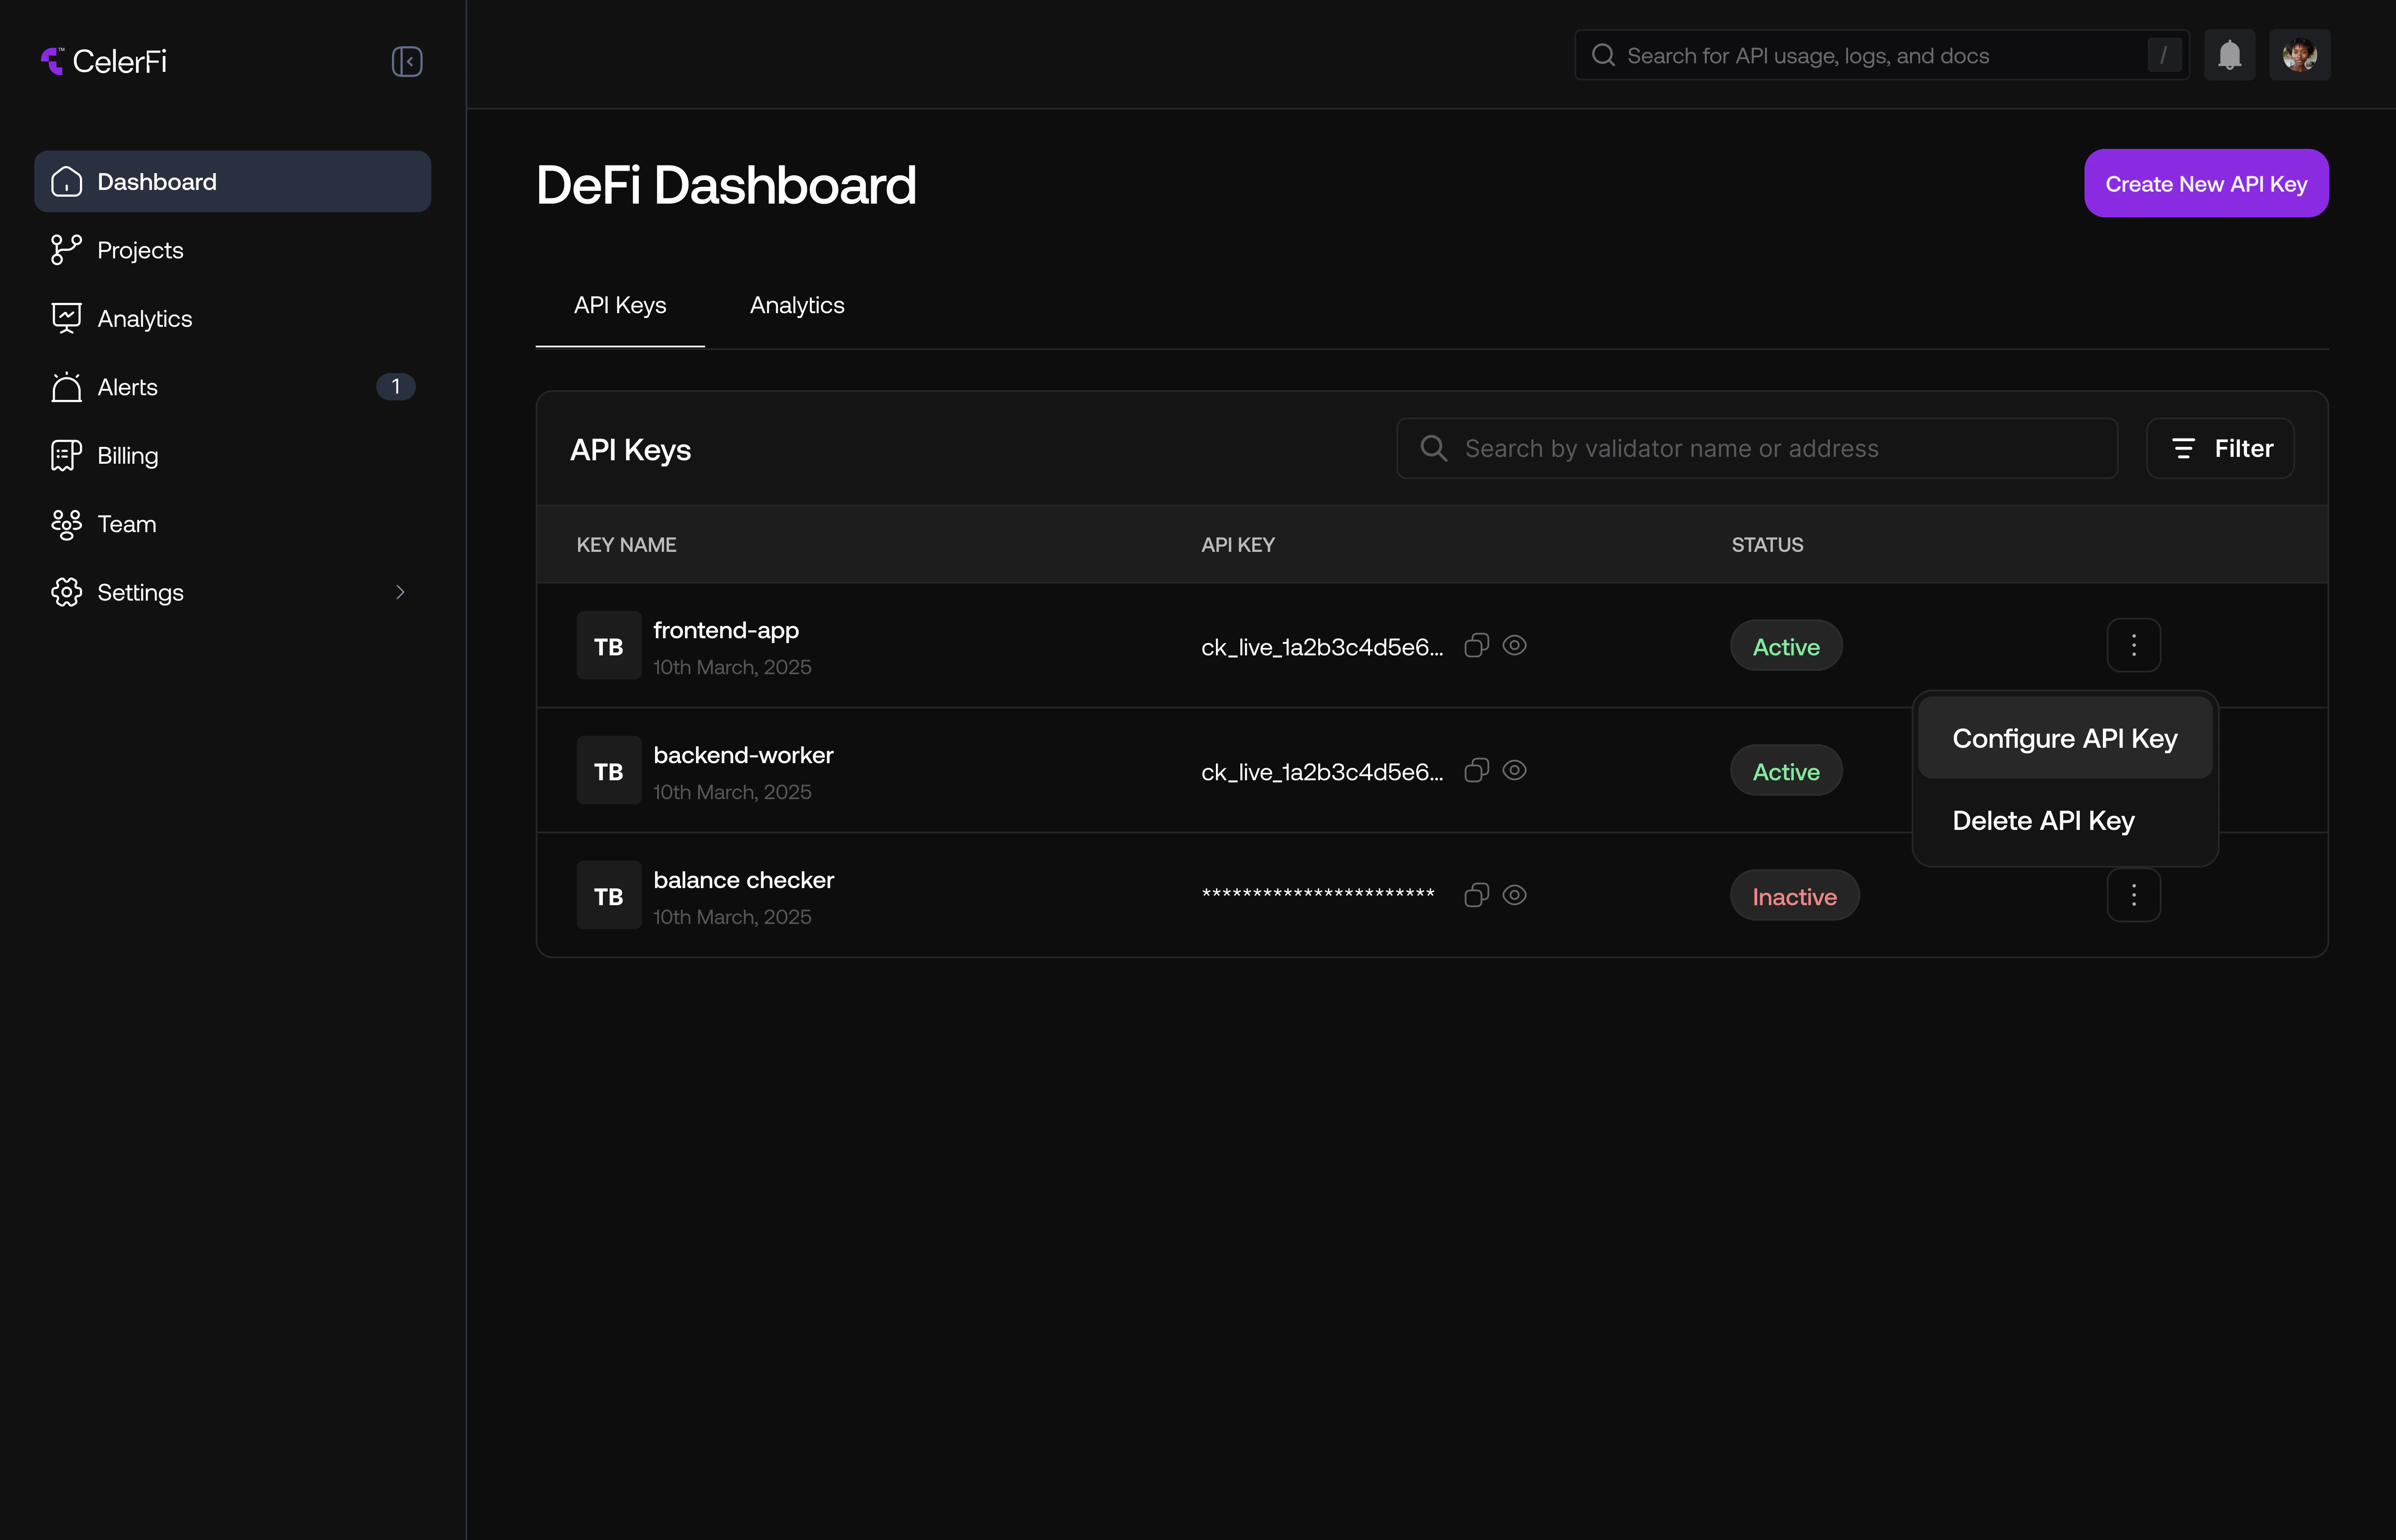
To access a project’s API keys and usage statistics, follow these steps:- Click on the vertical ellipsis (three dots) next to the project you want to manage and select “View Project Details.”
- Navigate to the “API Keys” tab to view, create, or manage your API keys. You can create multiple API keys for a single project.
- You can view usage statistics depending on the services enabled for your project. For example, to view RPC usage statistics, navigate to “RPC analytics” tab. You can do the same for the Indexer service if your project has it enabled.